
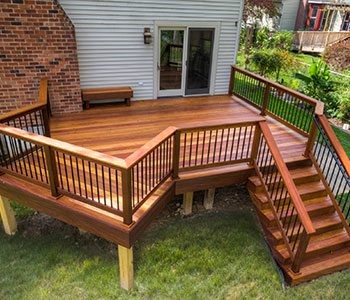
Tips for staining a previously wooden deck, Home backyard character, Decing splintered boards
Tips for staining a previously wooden deck: guide
11 Aug 2020
Adding a stained deck to your backyard adds a character and elegance to your outdoor living. However, the main issue is keeping your deck looking the same way that it once did. Factors such as exposure to the elements, the climate, and the materials used to build it, can all impact the life of your stain job by at least 15 years. So read on as we dive into maintaining your already stained deck.
Preparing Your Deck
During your prep stage, you’ll need to determine the existing condition of the deck. This allows you to determine if there are any repairs that need to be carried out. However, the following should also be noted:
* If your deck has rotten or splintered boards, staining will not fix them
* Any nail heads that are popped up should be hammered down
* If deck boards have started raising, warping, twisting or cupping, you’ll need to get them fixed to that your family and guests don’t trip on them
If you’re planning to replace any boards, it is advised that you do so with screws since they can hold down edges that nails can’t. Once you’ve established all boards and nails are in order and before you stain the deck you should get a good powerwash done. A+ SoftWash has a technique for soft washing using powerful but green (natural ingredients) solution for washing the deck and removing any bacteria that’s built up in the wood.

Tips for staining a wooden deck
It’s also a good time to determine if you want to restain with the same color or simply change it to something lighter or darker. It’s best to keep in mind that no matter which you go with, you’ll need to prepare the surface to receive a new stain. Based on the size of your deck, you’ll also need to scrub the surface by hand or with a power washer.
If you’ve preferred to use a power washer, the key is to rinse your deck. Since most power washers come with a detergent feed, you can fill the container with a cleaning agent that is specified to your deck. A deck cleaning agent is perfect for dissolving and removing traces of mildew and dirt from the wood’s surface. During the rinsing stage, you can easily let the chemicals work their magic.
However, if you’re using a pressure washer, there’s a good chance that some grain from the wood will also be removed. When this happens, you can easily sand the deck to ensure that it is once again smooth. In the event that you’re manually scrubbing the deck, you can use some water and deck cleaner with a stiff brush to scrub the surface.
After scrubbing the deck, you’ll need to ensure that the wood dries before you can apply a fresh coat of stain. If you’re intending to use an oil-based stain, these typically dry in three days whereas water-based stains dry in as little as one or two days depending on the weather.
Decking Stain Choice
Choose Your Stain
After you’ve completed the prep stage, you can now choose your stain. Best exterior wood stain are available in a solid finish or a semi-transparent form – see https://woodwhiz.com/best-exterior-wood-stains. Semi-transparent stains are more opaque and add natural color allowing the natural wood grains to shine through. In the case of solid stains, they cover the wood and show texture while blocking the previous color and the grains.
When staining an already stained surface, it’s best to choose something that suits what you’ve already got:
* If your deck is light, you can apply a darker or similar color with no additional prep work.
* Darker stains are a bit hard to cover with lighter stains and the old color usually seeps through. So if you’re interested in lightening the current stain, it’s best to go with a solid stain.
* Semi-transparent stains can be easily covered with solid stains or semi-transparent stains.
* In the case where your deck is stained with a solid finish, you can apply another solid finish since semi-transparent stains don’t easily bind to solid surfaces.
Stain Application
This step of the process can be done by applying a small amount of stain to hidden areas and testing to see how well it adheres to the surface. However, if your deck has a protected finish, the stain wouldn’t stick and you’ll need to remove the finish.
As we conclude, we have just looked at how to restain your deck if it’s already stained. Stains bring out the true beauty in outdoor decks and with proper care and maintenance they can last for a long time. So before you get to staining your deck, remember you’ll need to properly prepare!
Comments on this guide to staining a previously wooden deck advice article are welcome.
Home Decking
Property Decking Posts
Need to Know About Composite Decking
Does Composite Decking Add Value To Your Home?
Tips for building a good looking deck
Architecture Designs
Building Design Posts
Decorating Hacks to Make Your Home Feel Unique
Ultimate checklist for renovating your home
How Much Does Attic Cleaning Cost Guide
Comments / photos for the Tips for staining a previously wooden deck page welcome