Elevate your home renovation, how to choose the perfect tile, Canada property renovation design advice
Elevate Your Home Renovation: How to Choose the Perfect Tile
22 May 2024
Are you planning a home renovation project and feeling overwhelmed by the endless tile options available? Fear not, because we’ve got you covered with this comprehensive and easy-to-follow guide. From understanding your needs to exploring the world of tile materials and designing like a pro, we’ll walk you through every step of the process, ensuring that you make an informed and stylish choice for your space.

Starting Your Home Renovation with the Right Expertise
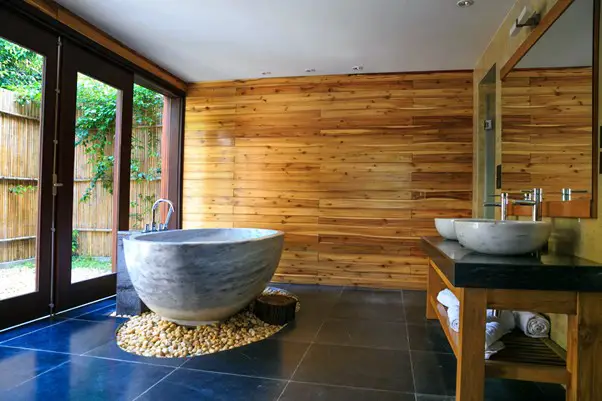
Embarking on a home renovation journey can transform your living space, but the myriad of choices, especially when it comes to selecting the right tiles, can be daunting. Whether you’re aiming to revamp your kitchen, bathroom, or flooring, the importance of choosing tiles that not only match your aesthetic but also meet practical needs cannot be overstated. It’s essential to seek the expertise of a seasoned professional to guide you through this process. If you’re in British Columbia, considering a reliable tile installer in Vancouver might just be the first step towards achieving your dream home makeover. This guide aims to simplify the selection process, helping you navigate through the vast tile options and design considerations with ease, ensuring your renovation results in a beautiful and functional space.
Step 1: Define Your Needs and Project Scope
Before you start browsing through tile samples, it’s crucial to take a step back and define your specific needs and project scope. After all, different areas of your home require varying tile characteristics. Here are some key considerations:
- Location: Will the tile be installed on the floor, walls, backsplash, shower, or countertop? Floor tiles need to be slip-resistant and durable, while wall tiles can prioritize aesthetics over extreme wear.
- Traffic Flow: High-traffic areas like kitchens and entryways demand tough, scratch-resistant tiles. Lower-traffic areas like bathrooms can accommodate a wider range of options.
- Moisture Exposure: Bathrooms, laundry rooms, and kitchens encounter significant moisture. Opt for water-resistant or waterproof tiles like ceramic, porcelain, or stone.
- Maintenance Preferences: Some tiles require minimal upkeep, while others may need sealing or special cleaning products. Consider your lifestyle and time commitment.
- Overall Design Vision: Tiles play a significant role in setting the aesthetic tone. Do you envision a sleek, modern look, a rustic charm, or a timeless elegance? Keep your design goals in mind.
Step 2: Explore the Tile Material Universe
Now that you’ve defined your project scope, it’s time to dive into the exciting world of tile materials! Buckle up, because we’re about to embark on a journey through the pros and cons of popular tile options:
- Ceramic Tile: A classic and affordable choice, ceramic tiles are available in a vast array of colors, patterns, and finishes. They’re water-resistant but not entirely waterproof, so regular sealing is recommended for high-moisture areas.
- Porcelain Tile: A more robust cousin of ceramic, porcelain tiles are denser and less porous, making them virtually waterproof. They offer a vast design selection and are perfect for high-traffic areas and moisture-prone locations.
- Natural Stone Tile: Adding a touch of luxury and timeless elegance, natural stone tiles like granite, marble, and slate impress with their unique veining and natural beauty. However, they require special care and sealing, as some stones are susceptible to etching or staining.
- Glass Tile: For a touch of shimmer and light reflection, glass tiles add a unique design element. They’re ideal for backsplashes, shower walls, and low-traffic areas, but can show scratches and water spots easily.
- Metal Tile: For a bold and modern statement, metal tiles offer a touch of industrial chic. They’re a great choice for backsplashes and low-traffic accent areas but can be prone to dents and scratches.
Step 3: Master the Art of Size, Shape, and Color
Beyond material, the size, shape, and color of your chosen tile can significantly impact the overall look and feel of your space. Here’s how these elements come into play:
- Size: Larger tiles create a more expansive feel in smaller spaces, while smaller tiles can add visual interest and work well with intricate patterns.
- Shape: Square and rectangular tiles remain classic choices, but consider subway tiles for a vintage vibe, hexagons for a playful touch, or mosaics for a decorative statement.
- Color: Light colors create a sense of spaciousness, while darker tones add an intimate feel. Consider the existing color palette of your space and the mood you desire to create.
Step 4: Achieve Tile Design Harmony and Balance
Tiles are powerful design tools, and using them strategically can take your renovation project to the next level. Here are some tips for achieving tile design harmony and balance:
- Pattern Play: Create visual interest with patterned tiles for floors, backsplashes, or accent walls. Remember, balance is key. Too much busyness can overwhelm a space.
- Mixing and Matching: Combine different tile materials, sizes, or colors for a unique and personalized look. Ensure the chosen elements complement each other for a cohesive design.
- Grout Matters: Don’t underestimate the power of grout! Grout color can complement or contrast your tiles, impacting the overall look. Darker grout creates a defined grid, while lighter grout offers a more seamless appearance.
- Sample Savvy: Always order samples before making a final decision. See how the tiles interact with your lighting and existing design elements. Consider creating a mood board to visualize your final design.
Step 5: Functionality Reigns Supreme
While aesthetics are important, functionality should never be compromised when it comes to tile selection. Here are some additional considerations to keep in mind:
- Slip Resistance: Especially for floors in bathrooms, laundry rooms, and kitchens, choose tiles with a textured or matte finish to prevent slips and falls.
- Durability: Consider the amount of wear and tear the tiles will experience. Opt for harder, more durable materials like porcelain for high-traffic areas.
- Maintenance: Think about your lifestyle and how much time you can dedicate to cleaning and upkeep. Some materials like natural stone require regular sealing and specialized cleaning products.
Step 6: When to Seek Professional Help
While many homeowners enjoy the thrill of a DIY tile installation project, there are instances where seeking professional help is highly recommended. Here are some scenarios where hiring a professional tile setter can be beneficial:
- Complex Installations: Uneven floors, intricate layouts, or challenging tile patterns may require the expertise of a professional to ensure a flawless and long-lasting installation.
- Large-Scale Projects: For extensive renovations or installations involving large tiles or heavy materials, a professional tile setter can save you time and ensure a precise and efficient process.
- Expertise and Experience: Qualified tile setters have the knowledge and skills to handle any tile-related challenge, from proper leveling and grouting to intricate cutting and fitting.
- Time-Saving: Hiring a pro can save you valuable time and frustration, allowing you to focus on other aspects of your renovation project.
Step 7: The Final Touches – Sealing and Maintenance
Once your tiles are installed, the final step involves proper sealing and maintenance to ensure their longevity and lasting beauty:
- Sealing: For porous materials like ceramic, natural stone, and some grouts, sealing creates a protective barrier against moisture and stains. Follow the manufacturer’s recommendations for frequency and application.
- Cleaning: Use appropriate cleaning products for your specific tile material. Avoid harsh chemicals that can damage the surface. Regular cleaning will keep your tiles looking their best.
Conclusion
With this guide, you’ve mastered the basics of tile selection. Now it’s time to translate knowledge into action! Utilize this information to choose tiles that perfectly suit your project’s needs and aesthetic. Remember, samples are your friend. Experiment and find what makes your space sing. Whether you DIY or hire a pro, take satisfaction in your informed decision-making. The result: a stunning and functional haven that reflects your unique style.
Comments on this guide to Elevate Your Home Renovation: How to Choose the Perfect Tile article are welcome.
Bathrooms Articles
Bathrooms Posts
The best flooring options for wet spaces
Bathroom end of tenancy cleaning
Building Articles
Residential Architecture – selection:
Comments / photos for the Elevate Your Home Renovation: How to Choose the Perfect Tile page welcome