Painting tips for do-it-yourselfers guide USA, Flordia building paint tips, Online FL property advice
Painting Tips for Do-it-Yourselfers
August 25, 2022
Many homeowners are familiar with the basic painting techniques. They understand the need to use drop cloths, painter’s tape, and how to stir a can of paint properly. But did you know that using a golf ball to maintain paint quality or microwaving paint tape to make it more workable can help?
The Pinnacle Management team advises that knowing a few more painting tips and techniques can help you achieve the best results with most DIY painting tasks. You may avoid flaws and cover surfaces uniformly by properly storing paint and using the right tools.
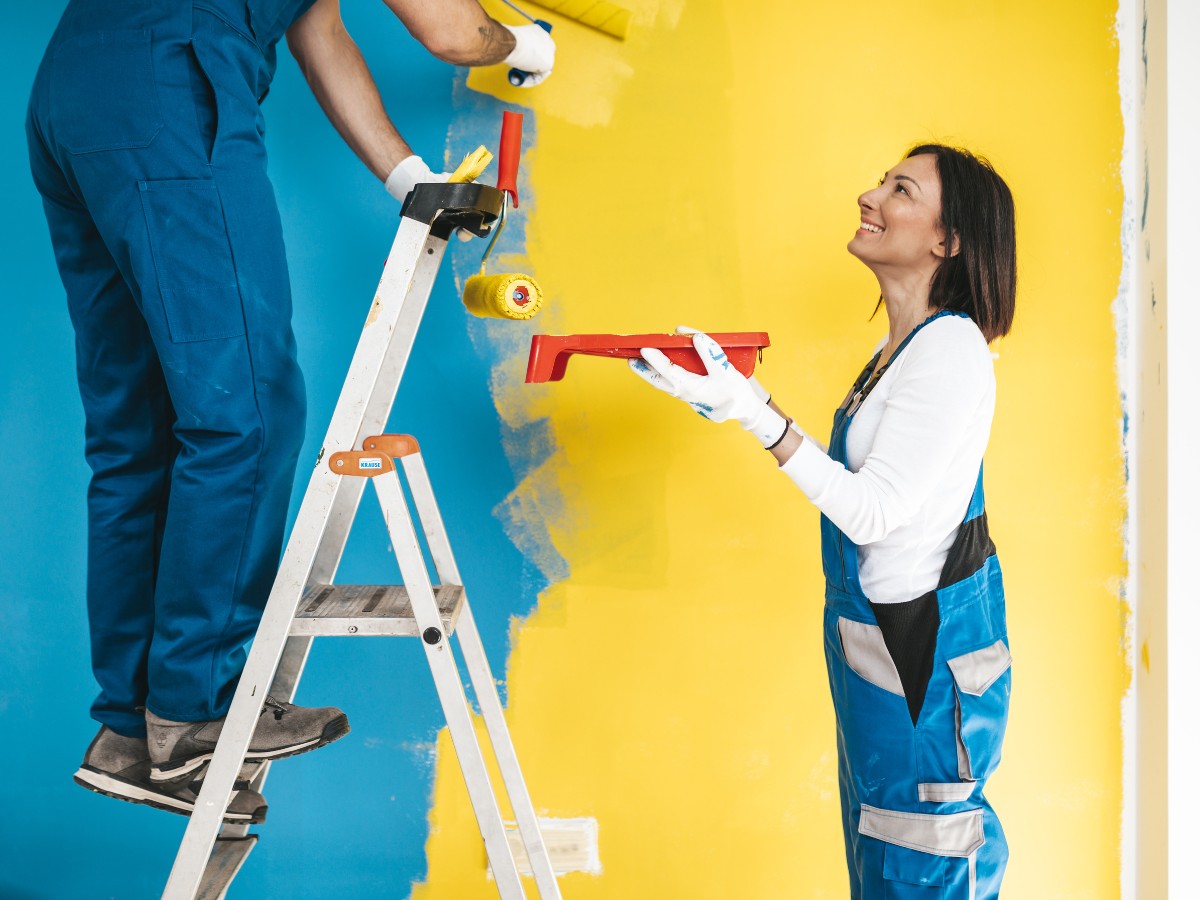
Painting Tips for Do-it-Yourselfers Guide
1. Put your paint rollers and brushes in a plastic bag and freeze them.
Wrap your brushes and rollers in a plastic bag and freeze them if you’re done for the day but intend on returning to work the next morning. This will save you time in cleaning. They’ll be ready to go once you’ve thawed them out.
2. Make use of a work light.
When natural light is unavailable, use a work light to improve color accuracy and visual presence when doing the large-scale DIY painting. Owning a work light is a lifesaver for detail-oriented artists. By focusing the work light on specific locations where you use different painting techniques, you may be able to identify flaws in the coat that you wouldn’t have noticed otherwise.
3. Begin from the top down.
To avoid paint splatter and drips, follow this DIY interior painting tip. It’s simple, practical, and gives the consistency you desire. You may prevent the mess that comes with going the opposite direction when wet paint starts damaging the semi-dry coats you just finished by starting from the top.
4. Instead of masking tape, use painter’s tape.
If you’re planning to use masking tape, we recommend using painter’s tape instead. Tape should be used to protect the corners of your walls from extra paint. Like masking tape, it won’t leave an adhesive mess. Painter’s tape also prevents paint from seeping through, resulting in a clean finish that eliminates the need for post-work cleanup.
5. Consider using a paint extender.
Brush and lap marks are eliminated when you mix your paint with a paint conditioner. Furthermore, the prolonged drying time offers you more than enough time to correct any mistakes.
6. Use a rubber band to secure the paint can.
You don’t necessarily need to use a lot of paint. To remove excess paint from your brush or roller without making a mess, tightly wrap a rubber band around the container. This will help you avoid unintentional dripping and work with accurate and precise outcomes.
7. Use colored primer.
You can also use a colored primer instead of a typical white primer. They have greater coverage when it comes to covering old paint on your walls. You’ll notice more vivid walls with just a few coats.
8. Avoid using tape on your windows.
According to painters in Saratosa Florida, you shouldn’t use tape to cover your windows. The paint will bleed through the glass and stain it. It’s advisable to leave them alone and allow any paint spill to dry before scraping it away with a blade.
9. Thoroughly clean the surface.
Professional painters know how vital a polished surface is to a flawless paint job. Newbies sometimes ignore this stage because they believe it has no bearing on the final product. Painting on a dirty surface with old paint residue can cause peeling, and the paint will not adhere correctly to the wall.
Any chips, cracks, flaking, or peeling should be addressed. The surface should be sanded, scraped, and washed. Use epoxy or putty to fill in any gaps or cracks.
10. Do not let your paint dry.
Half-empty paint cans will dry out. To fill any air gaps, drop golf balls in the paint can. Or, place plastic wrap underneath the lid and seal it tight.
11. Purchase a paint pen.
Purchase a paint pen that allows you to load a small amount of your new paint color into it for later touch-ups. Once filled, these pens keep the paint inside fresh for almost a year; give them a good shake before using them to ensure the color comes out smooth and evenly.
12. Determine the type of paint currently on the walls.
You can test an existing wall to determine what type of paint has been applied. Soak a cotton ball in alcohol and massage it on the wall in a small area. If there is paint residue on the cotton ball, the paint is latex; if there is no paint on the cotton ball, the paint is oil-based.
Key Takeaway
Whether you’re preparing to sell, altering your decor, or performing essential home maintenance, these painting ideas for a do-it-yourselfer will help you enhance the quality of your work while saving time and money. However, if you have limited time due to a hectic schedule, you can always seek the services of professional painters to lend a hand and accomplish your home renovation for you. By doing so, you’ll enjoy your new space in no time.
Comments on this guide to Painting tips for do-it-yourselfers article are welcome.
Painting Your Home
Painting Your Home Articles
Acrylic Painting Materials To Include In Your Studio
Exterior Painting Based On Your Home’s Style
Residential Buildings
Residential Architecture
Design: CMC architects
photograph : BoysPlayNice
Tee House Wellness Center, Celadná
Comments / photos for the Painting tips for do-it-yourselfers advice page welcome