Acrylic painting materials to include in your studio guide, Online architectural paint advice
Acrylic Painting Materials To Include In Your Studio
20 Jan 2022
That said, the painting material to include in a studio can differ vastly depending on the types of paint to be used. As more people experiment with the medium, many new products have come in the market that would tingle the artist’s curiosity.
And to give you a detailed understanding, we would like to review all the acrylic painting equipment that one can consider including in their studio. We will even discuss the benefits and uses of each material to help you better understand how to create a perfect studio with the right acrylic paint equipment.
So, let’s quickly dive in!
Acrylic Painting Materials for your Studio
Most Essential Acrylic Painting Equipment
Selecting The Correct Paint
When designing a studio, it is essential to first identify what your painting goals are. A seasoned painter generally has their paintings displayed in art galleries. Hobbyists, on the other hand, typically do not showcase their artwork in front of a big audience.
If you are wondering how this fact is important, let us break it down for you. Your studio setup is highly dependent on how you practice art: as a professional or take it up as a hobby. The materials that you need to include will also depend on that.
It is understandable that for people who are beginners in the field of art, spending a hefty amount on a studio when starting off would not make much sense. So, it is best that you invest in cost-effective paints that won’t leave a dent in your pocket.
To begin with, we would suggest that you purchase student-grade options or tester packs that would help you learn how the medium works. These variants are fairly affordable and will get the work done.
On the other hand, if you are a professional artist, we understand that you would not want to use poor-quality painting materials. To experience the finest colors on your canvas, it is essential to get your hands on high-quality artist-grade paints. Unless the paint is of good quality, it might have a detrimental impact on your artwork.
Choosing The Right Brushes
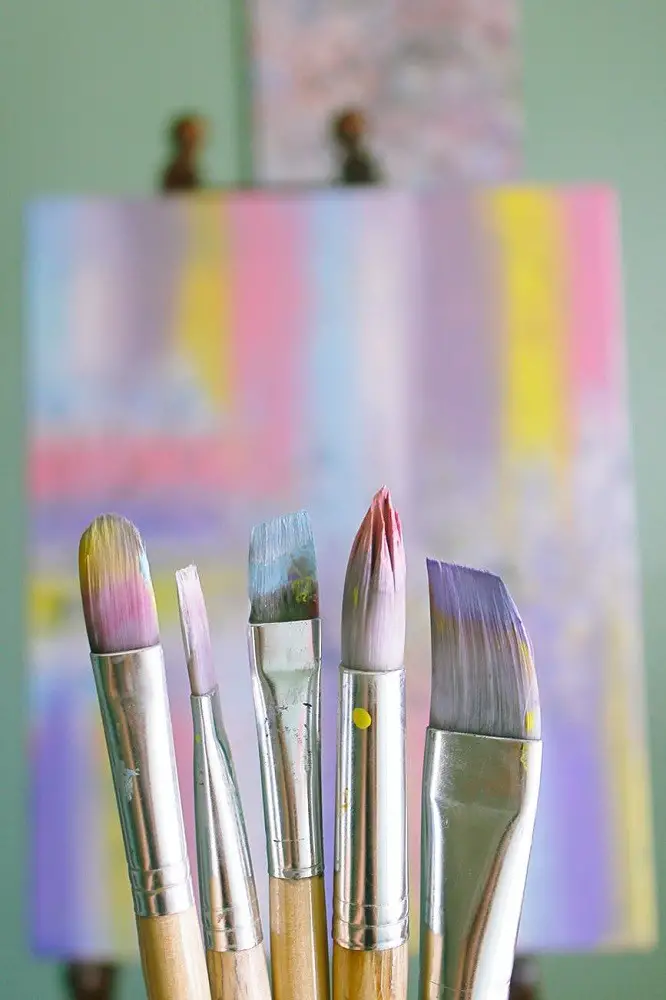
Just like paint, getting your hands on the right set of acrylic paint brushes is an absolute must when setting up a studio. Irrespective of your level of expertise or the type of art that you practice, paintbrushes are a prerequisite to making magical artwork.
On visiting the market, you will find paintbrushes that vary in terms of their length, the softness of the bristles, and, most importantly, thickness. The paintbrushes are numbered in terms of their thickness. Select one or a few brushes, based on the type of effect that you want to create on your canvas.
Over time, you will end up purchasing a number of paintbrushes, and your collection will only grow. The questions that arise are: How much to spend on the brushes? How to stock them up?
When working with acrylic, you need to remember that it has its set of advantages and disadvantages. Many people take to this medium as it dries very quickly and thus helps save a substantial amount of time.
But this, on the other hand, damages the paintbrushes extensively. Acrylic colors can dry on your brush within an hour and can be pretty difficult to remove unless you have the right expertise. So, when starting out, it is best to invest in brushes that are affordable and not too expensive.
We would suggest that you test starter packs that can work as excellent replacements for high-quality paint brushes. This will help you save tons of unwanted expenditure. In case your most-liked brush gets damaged during a painting process, you can simply replace it without having to think too much. Only when you are acquainted with the medium should you spend on expensive brushes.
Adding Blankets And Rugs Are An Absolute Must
Before you can set up a studio, it is essential that you understand the acrylic medium well in order to know what all to include. Acrylic paint, for example, dries up pretty fast and is close to being permanent. You will find hundreds of videos on the internet where people talk about how to eliminate hardened acrylic paint from carpet or clothes.
Unless you are careful, you might end up in a similar fix.
So, what you need to do is take proper precautions to ensure that you avoid falling into this trap. Make sure that you always protect your surroundings properly. And, the best way to do that is to get rugs and blankets that can protect your studio floor from catching the paints.
It is not impossible to remove acrylic paints from the floor of your studio. But by taking the right precautions, you can focus more on the painting and less time worrying that the floors might get stained.
If you are still not convinced, let us tell you that there’s another added advantage to using blankets. When you are creating a painting that takes a long time to complete, blankets and rugs can give you much-wanted comfort. We recommend that you also cover the surrounding areas with blankets and not just the floors.
All it takes is one wrong move for the paint to spill and damage the surfaces. If you do not have spare blankets handy, another alternative that you can use is old paper. The only problem with using this is that it produces an unwanted crunch if you walk on it.
Choosing Paint Surfaces
It goes without saying that modern art is no longer restricted to just paper. More and more artists are experimenting with different surfaces to give life to their art. When you want to experiment with art surfaces, acrylic can be your best option as it can be used on almost all types of surfaces.
Be it plastic, wood, metal, glass, or cardboard, acrylic goes well with all. So many artists prefer it as it adheres well to mostly all types of unconventional surfaces. But, that does not mean you cannot put acrylic paint on conventional surfaces such as linen or cotton canvas.
It is best to stick to painting on traditional surfaces like canvas and paper for people who are just starting out in their art journey. Unlike professionals who have years of experience working on different surfaces, you might face immense difficulty when handling unconventional materials.
Another important thing to add to your studio is acrylic gesso. When you work with the acrylic medium, you will notice that it has a tendency to get absorbed very fast, and many artists have to face problems because of that. When they add one too many layers of color, it can make the artwork look cakey and blotchy.
You can consider applying gesso to avoid this issue as it will do the work of a primer and combat the absorption problem. Make sure you look up some videos on the internet to learn how to apply gesso to enhance the overall texture of your artwork.
To sum it up, depending on your level of expertise, choose your working material wisely and always keep some gesso handy. Keep a good stock of gesso in the art studio, and refrain from being miserly during applying it. Artists even apply more than one layer for the perfect finish.
Get The Right Palettes
A color palette is an absolute necessity when you have to mix colors and get the hue that you want for the artwork. Unless you mix the colors properly on a palette, it might lead to a disastrous effect on your art surface. When we asked artists about the most important thing that they feel one needs in a studio, we heard about paint palettes quite a few times.
The question that you might have is: how does one select the right color palette to mix acrylic colors? There are thousands of palette varieties that you will find on the market. However, it is important to note that, unlike watercolors, which can be mixed on almost all kinds of surfaces, acrylic colors can be blended only on certain types of palettes.
Most artists who work with an acrylic medium claim that paint blends seamlessly on glass and helps achieve the perfect texture for an artwork. When working with acrylic color, it is best to select a flat-surface glass palette to blend the colors. If you are using a glass surface, you do not have to take the hassle of repeatedly mixing paint.
Another trick that can give your artwork an edge is doing away with the paintbrushes and using palette knives instead. Unless you are a seasoned painter, you will notice that paintbrushes absorb a lot of colors, and mixing them properly needs the right expertise. A palette knife can help you tackle this issue and get the color that you have been looking for.
When you are making use of a glass surface and palette knives, you will have to spend significantly less time cleaning them on finishing the painting. Get your hands on a razor, and you will be able to scrape the color off the palette completely.
Once you scrape the colors, give the palette a gentle rub with a wet cloth, and your work will be done.
Cleaning Tools
There’s no doubt that a clean environment will likely inspire more creativity than a dirty and cluttered space. Nobody likes using art materials that are stained and dirty.
So, when we were making this list of crucial materials to include in the art studio, we could not miss out on some crucial cleaning tools. The right equipment will help keep your studio clean and pristine.
When you are working with acrylic colors, cleaning a paint blob or omitting a brushstroke is pretty simple. There is no need to implement harsh chemicals such as mineral spirits or turpentine to remove the paint. All you need is a plain cloth rag, and that can help you remove the paint effectively.
All natural fabrics and clothes have a high absorption capacity, and that makes them a great choice for dealing with acrylic paints.
Another major challenge that artists face is maintaining and cleaning their paint brushes when working with acrylic colors. As we have mentioned before, you are going to damage a few of them when you are just starting out. But to make sure that the paintbrushes stay good for a long time, you have to come up with efficient techniques for preserving them properly.
One of the most effective methods to employ is to rinse it twice. For this to work, you need two jars filled with water. Water is the ideal cleaning agent for acrylic paint, and you need to wash the brushes twice to ensure that no paint sticks to them.
To make sure that your paint brushes have a long life, it is essential that you implement a few cleaning methods regularly. This will not only enhance the longevity of the brushes but also maintain the cleanliness of your studio.
Easel
An easel is a must addition if you are creating an artist studio. Every beginner starts with practicing on a plain surface like that of a table, and eventually, as they get better, they move to work on easels. It is best to shift to easels as drawing on a flat surface can disrupt your perspectives and even cause headaches when working for a long time.
Adding an easel to your studio can help you get rid of these issues. Painting on an easel is the best alternative to working on tables and will help you achieve greater accuracy and allow you to work with ease. You need to select an easel, which would fit your needs perfectly. While some people like to paint standing, there are others who like to sit and paint.
Easels are broadly categorized into three types:
- Frame Easels
- Tabletop Easels
- Portable Easels
You should opt for tabletop easels if you prefer to sit and draw. When you are working on an art piece with a lot of intricacies, it will take a long time to finish, so it is best to sit and paint. And, for that purpose, there is nothing better than a tabletop variant.
However, most artists prefer to opt for frame easels as they offer a great deal of versatility. Many of the variants even come with collapsible technology and are suitable for creators who have a compact studio. These easels are suitable to fit any surface and exhibit strong bases.
On the other hand, portable variants are best suited for those artists that like the utility of framed options but prefer painting when they paint or travel. Bear in mind that making art without an easel is almost like cooking without an oven; in short unprofessional and pretty inconvenient.
Underdrawing Materials
It is true that artwork takes much more effort than what meets the eye. An artist puts a lot of effort and makes many layers to the painting to turn it into artwork. Unless you have painted before, you will only be able to see the final result and not what’s underneath it.
Underdrawing is basically the primary sketch that you make before you start a drawing. It works as an outline and a guide. After putting coats of paint on it, the spectator can no longer see the underdrawing. So, when you get into making serious art, you need to stock underdrawing materials in the studio.
It is best that you don’t skip this step if you want to avoid making a mistake in the final draft.
So, now let’s get on to what materials you can use for underdrawing! After talking to multiple artists, we gathered that charcoal and graphite are the most popular choices. Keep in mind that both these pieces of equipment have their own sets of advantages and disadvantages, and it is best that you research well before using them.
If you opt for charcoal, we would recommend that you put a fixative prior to applying the first coat of color or wash. A fixative helps to fix the charcoal to the layer and does not allow it to mix with the paint. It restricts the charcoal to mix with the color, thereby giving it a darker hue.
Bear in mind that underdrawing is an important part of art-making, even if the outlines are not noticeable in the final results. So, it is always advisable that you keep underdrawing materials in your studio.
Materials To Improve Flow
As we have already mentioned before, acrylic paint dries very fast, which has a good and a bad side. It is true that some people prefer using acrylic because the drying time is significantly low. But, keep in mind that this is not necessarily a good thing.
When you are making a large-scale artwork, you might prefer the color to be fluid for long so that there is enough flexibility. If you like to improve the fast-dry trait of acrylic paints, a product that would improve the paint flow might come in handy. Simply using raw acrylic colors would make them dry very fast.
So, it is best that you introduce a flow improver to the mix in order to work at your own pace. Just like artists use linseed oil with oil colors, you have to use flow improvers with acrylic colors. Some of the flow improvers that you find on the market are pretty concentrated, and you might have to water them down a bit.
But, as we said, flow improvers are not an absolute must, and unless you are making a large-scale project, you can even avoid it. If you are making a small-scale painting, you can directly use acrylic colors on the canvas. Having said that, it is not a bad idea to keep a flow improver in your studio and try to see how it works for you.
The other thing to try apart from flow improver to give your acrylic painting an edge is a retarder. This will help slow down the drying period considerably and help the colors to blend better, thereby highlighting the painting better.
Varnish
We are about to complete our list, and there’s no way we could wrap it up without the one material that is needed for the completion of a painting. When you are making a masterpiece, it is essential that you also perform the steps crucial to preserving it. Applying varnish to your paintings is the final step that helps maintain the artwork.
On the market, you will find a wide range of varnishes that you can try with acrylic colors. Some people prefer to go for varnishes that exhibit a matte finish, while others prefer a more glossy finish. You can even find options that offer a combination of these two finishes to preserve your painting for a longer time.
That said, it is not a material that every artist puts to use. In case you are a beginner or a hobbyist and do not intend to showcase your artwork to a larger audience, there is no requirement to preserve it using a varnish.
However, the more you advance in the quest of becoming a professional art practitioner, you will realize the importance of varnishes and materials that help to improve flow. When used correctly, these materials can help add an edge to your works.
It is true that you won’t find varnish in every artist studio, but we suggest that you get some and experiment with the material to see how it works.
The varnishes that you find on the market mainly help deliver a transparent and durable film on your artwork and protect it from damage. This layer protects your artwork from water-based damage, chemicals, and even ultraviolet radiation. Make sure that you do not compromise with the varnishing quality, as that would directly impact the longevity of your artwork.
Acrylic painting materials for your studio – Final Words
There is no doubt that art is a creative process and takes a long time to perfect. If you are trying your hands on painting, understand that everyone has to follow a learning curve.
With grit and consistent effort, you can slowly transition from being an amateur to an expert artist.
Having said that, it is essential to note that the materials you use to make art also play an important role. Unless you have and use suitable materials, the art-making process will become unproductive, and you will be unable to achieve the desired results.
So, it is very important to stock your studio with the right materials as that would help add an edge to your art practice.
Until next time, adios!
Comments on this guide to the Acrylic painting materials to include in your studio article are welcome.
Building Articles
Residential Architecture
Property Painting
Art & Painting Your Home
Beach landscapes: new wave of impressionistic paintings
What to know before picking a painting brush
Advantages of painting exterior of your house
Comments / photos for the Acrylic painting materials to include in your studio advice page welcome.