Keep renovation & building costs under control, property refurb costing, home renewal pricing
Keep Your Renovation or Building Costs In Control
12 money-saving ideas that will keep your budget on track – Architectural Article by Houzz
12 money-saving ideas that will keep your budget on track
10 Jul 2017
How to Keep Your Renovation or Building Costs Under Control Tips
Full article first published on Houzz
Dominic and Marie Bagnato, Houzz Contributor
For anyone set to embark on a new build or renovation, budget is likely to be top of mind. While it’s no secret that big-ticket items for the exterior of a build can blow up costs in an instant, many people tend to forget that the fixtures and finishes you choose for the interior can have a dramatic impact on the final price, too.
Fortunately, unlike the exterior of a building – where once the size and shape are decided it’s difficult to make changes – you can re-specify interior items during the design process, saving money where and when you need to. So let’s explore 12 key interior design considerations you need to be aware of when setting your budget, and look at some easy ways you can keep costs under control. For more tips, check out Koopy’s article on how to reduce home renovation costs.
1. Think about feature wall colours
Unlike painting an entire room one colour, the cost of feature wall colours can really add up. This is because the painter has to ‘cut in’ every time one colour meets another – a time-consuming process. The more colours, the higher the cost.
To keep costs down, restrict the number of feature wall colours you choose. Also limit the number of walls to be painted a feature colour as each time they meet another surface (ceiling, architraves or skirting) the painter has to carefully paint a straight line in order to achieve a perfect contrast. Not only will you get charged for the extra painting time, but for the time it takes the painter to stop, wash the brushes and start again with a new colour and paintbrushes.
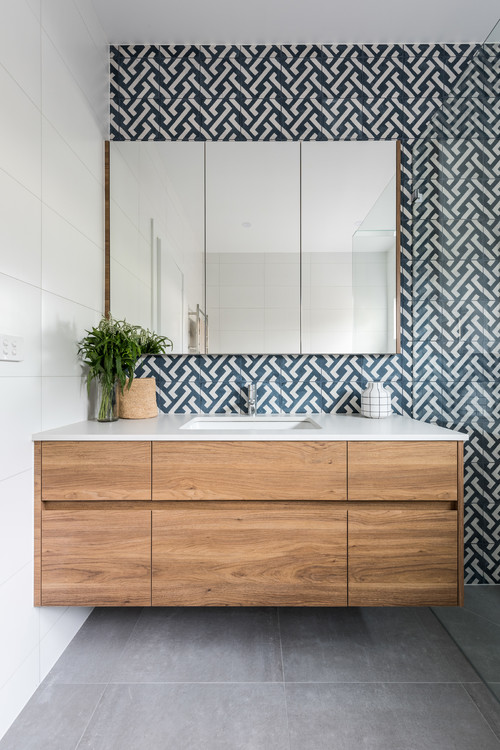
This bathroom is by Williams Cabinets in collaboration with Eat.Bathe.Live.
2. Tame your tile choice
Choosing several different tiles for your floors and walls can really add to the cost of your bathroom, especially if you’ve opted for unusually shaped or intricately patterned designs. The tiler will need to spend more time getting the pattern and positioning right, and instead of charging you by the metre, they will charge you an hourly rate to lay the tiles, which quickly adds up. There is also the potential for wastage as some tiles may need to be cut to fit the space. Multiply this by several bathrooms and the cost can soon spiral.
If you love a patterned tile, choose a simple shape. This will limit wastage and laying time. Also consider giving this royal treatment to just one bathroom in your home.
Choosing a single tile shape and colour for both walls and floors will give your bathroom a luxurious feel, plus it will reduce wastage and cost. Use the same tile in all the wet areas of your home and you may get a bulk discount, saving you even more.
Natural stone, ceramic and porcelain are the main tile materials. Ceramic tiles will give you the same look as expensive stone, but are far cheaper to buy and lay.
Find tiles for your home with Houzz

3. Talk window frames
Popular materials for window frames are timber, aluminium or, if cost is no issue, slim-profile steel. There are many ways to keep costs down, but choosing a cost-effective profile is perhaps the easiest. Aluminium frames, for example, come in three different profiles – commercial, semi-commercial and residential – with the latter being considerably cheaper than the others.
Most volume builders use residential aluminium windows because they are cheap and readily available. When I select this profile for my projects I opt for black, which tends to visually retreat into the wall.
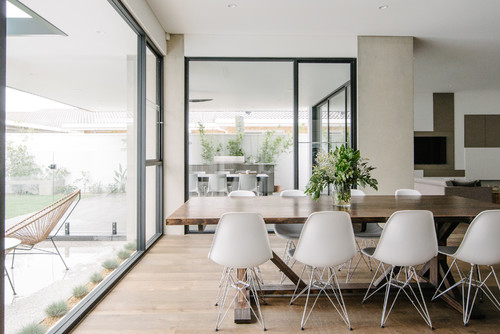
As a rule, the more windows you have, the more expensive the build will be. Try and maximise the size and amount of glazing in your living areas where you want to enjoy solar penetration and views, and minimise glazing in spots where you spend less time, such as bedrooms.
The larger the sheet of glass, the heavier it’s likely to be, which adds to the purchase and installation cost. Sometimes you’ll find that two windows next to each other cost less than one large one.
4. Ditch the drawers
Kitchen drawers provide great storage; not only do they keep your kitchenware well organised, but they allow you to see the contents at a glance. However, with bespoke kitchens, drawers cost considerably more than basic kitchen cupboards. While cupboard doors have a simple hinge, drawers require extension runners so you can pull them out, and these come in various sizes and qualities. The more drawers, the higher the cost of your bespoke kitchen.
If you still can’t go past the idea of drawers but you’re on a budget, consider housing inexpensive pull-out basket drawers behind cupboard doors.
If you will be installing a lot of drawers, consider the type of extension runner carefully. Styles and prices vary; some have soft closers and full extension, while others only extend half way and won’t close on their own. The runner you choose will impact the final cost of the drawer.
5. Weigh up worktop options
There are several different worktop materials to choose from, including natural stone and timber. But the decision-making process and cost implications don’t stop there. Other considerations to factor in include profile and sizing. As a rule, specifying larger nosing (edges) or a worktop that continues down the sides of an island will increase the supply and installation costs of the worktop.
Choosing to top-mount rather than undermount appliances will help keep kitchen costs down. While both types require a stone supplier, for instance, to cut a hole in the worktop, with top-mounted appliances they will need to polish the visible edges of the hole too, which adds to the costs.
Small details to give your kitchen a design edge
6. Look into lighting
Electricians generally charge to install light fittings by quantity. The more downlights you have, the higher the labour and installation costs. There is also the added cost of buying the light fittings and the bill shock you get for the electrical output. Limiting the amount of downlights and placing them strategically so they deliver the right light output where it’s actually needed will keep costs down.
Most lighting suppliers offer a free lighting service where they’ll design a layout tailored for your house and specific lighting needs. This not only saves you money, but gives you a well-thought-out design. It does mean that you will have to buy the light fittings from that supplier though.
Discover great lighting products on Houzz
7. Don’t forget the light switches and power points
They’ve become a real fashion statement of late, but choosing non-standard light switches and power points can add significantly to the cost of your build. And while there are all sorts of styles on the market to choose from, from ones that light up to touch-sensitive styles, they all essentially do the same thing – turn your light and power on.
Your electrician may also charge you more to install a specialist fitting, with possible extra labour costs on top of that to cut a hole in the wall if the wiring deviates from normal.
In my projects, I specify cheap light and power switches for those areas that are not seen, such as inside cupboards. I keep more costly and attractive switches for visible areas.
8. Fine-tune the floors
If you love the look of timber flooring but want to keep costs down, choose common, readily-available species such as oak. And when you’re budgeting for flooring, remember that your supplier will quote you per square metre for the timber, and this price won’t usually include laying or staining if you have someone else installing it.
With a timber floor, you’ll need to decide whether to top nail it to the substructure and let the floor installer putty the hole and sand it, or to ‘secret nail’ it by fastening the nail through the tongue of the board into the substrate. The latter option is invisible, but costs more.
Engineered wood can be a cost-effective alternative to solid timber. It has a layer of timber veneer on top of a cheap timber interlay. It comes in a variety of species at affordable prices, allowing you to have an expensive species at a fraction of the cost of its solid equivalent.
When shopping for engineered wood flooring, ask the supplier to specify the thickness of the veneer component. Some veneers are only a couple of millimetres thick and, if scratched, will expose the cheap timber underneath. Engineered wood with a thicker veneer allows you to sand back the floor a couple of times if required, providing a better investment.
More stunning alternatives to solid wood

9. Consider ceiling heights
Ceiling heights are often dictated by the size of the plaster sheets available, which are generally 1200 or 1350 millimetres high. Most volume builders prefer 2400-, 2550- or 2700-millimetre-high ceilings because they can use two plaster sheets on top of each other with only the one join. However, if you were to specify a 3000-millimetre-high ceiling, even though you have only slightly increased the height, the builder would charge you for an entire extra plaster sheet. Multiply this across all walls and the cost is huge.
Stick to standard-height ceilings for most areas and then choose one room in your home to make a dramatic statement with an oversized ceiling.
Square setting, where there are no cornices at the line where the ceilings and walls intersect, can be a great way to make a standard room height feel taller. While square setting generally costs more than a basic cornice finish, it’s still considerably cheaper than raising the height of the ceiling.
You can balance out the cost of square setting by installing cheap cornices in parts of the house where they won’t be seen, such as inside cupboards and the garage.
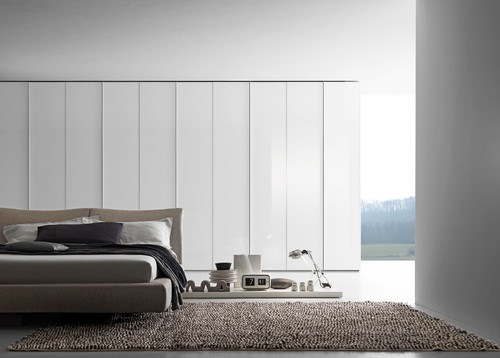
10. Reconsider bespoke wardrobes and cupboards
It’s easy to see the appeal of custom-made wardrobes; they can be designed to suit your storage needs and the space perfectly. But they can also blow your budget. To reduce costs, limit how many you install and the number of drawers and specialised fittings.
Or have a wardrobe incorporated into an alcove. The builder simply installs a rail and shelves, then installs architraves and doors from the outside.
11. Save on appliances
Have your heart set on specific high-end appliances for your kitchen or utility room, but shudder at the price? Scratch and dent sales can be a great way to save. If the back and sides of an appliance are damaged, where no one will ever see them, you can save money without compromising on looks.
If you’re buying a new but slightly damaged item, you should still be eligible for a full warranty. Check with the supplier.

12. Take control of the taps
Taps come in various finishes and can be mounted on a unit or wall. For practical spaces such as a utility room, where looks don’t matter as much, keep costs down by choosing a standard tap design. Keep that stunning and costly tap for public areas, such as a guest bathroom.
Price shouldn’t be the only consideration when you’re choosing a tap; also ask the supplier about the warranty period and the type of internal mechanism that makes the tap work.
The way you choose to mount a tap will also affect cost and scheduling. Wall-mounted taps look impressive, but have to be installed in the early stages of a build before the splashback and vanity are ordered. The plumber simply can’t get the location of the tap wrong as it has implications down the track when centring the basin under the spout.
Mounting a tap on the basin is cheaper than on the countertop, as a hole may need to be drilled through the surface to allow for the tap.
You need to choose the tile or stone thickness for your splashback before the tap is installed. This is because the plumber needs to know the thickness so he or she can install the tap in the studwork at the right depth. If you change your mind and the thickness of the splashback material alters, the tap handle may not fit the spindle.
Residential Property Articles
Architectural Articles
Globalisation Architecture by Trevor Tucker
Barclays Center Brooklyn by Dimple Soni
Comments / photos for the Keep Your Renovation or Building Costs Under Control article page welcome