
Beautify your crown molding with rope lights guide, Property lighting advice, Home lamp online tips
Beautify Your Crown Molding With Rope Lights
19 Jan 2021
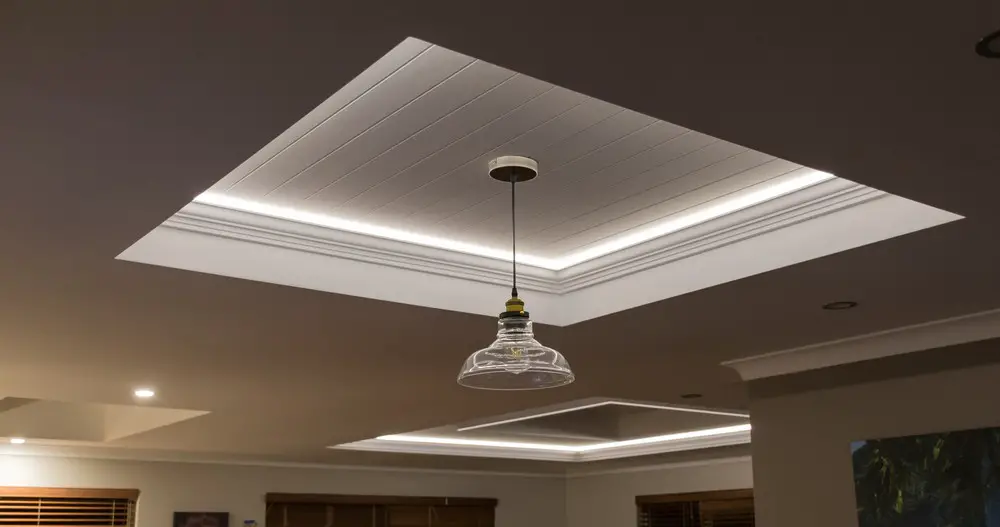
Just imagine how your living room’s crown will look if you innovate it by embellishing it with a warm and soft sparkling glow –probably the rope LED lights. Stop imagining, and start doing!
Introducing LED rope lights to the coves and crowns invites an element of a deep and immersive environment, a perfect touch of charm, a splash of fun.

If you are bored of retro-styling in your home and want some classy innovation, it’s time to introduce the accents of lights to the curves, coves, and crowns.
Trust me; enhancing indoors with rope lights (splatter-records.com – not online when checked 16 February 2024) will make your dull and boring rooms into a paradise.
Although those 40-watt LED bulbs have their own charm and are even suitable in some settings, they don’t have the real innovative power of rope LED lights.
The amazing thing is you don’t certainly have to invest a hefty amount in hiring another interior designer to remodel your indoors. You can enlighten your crowns and coves yourselves too.
Let’s cut to the chase and explore all the detailed steps you’ve to follow to beautify your crowns by installing these flexible rope LEDs.
Beautify Your Crown Molding With Rope Lights Advice
How to Install Rope LED Lights –Step-by-Step Guide
If you’re quite engaging and have a deep architectural interest, you’d perform the task better yourself.
No matter if the process is along one wall or the way around the room or even complete home, the standard installation knowledge is all that you need.
Things You Need
Before you start the process, make sure you have the following tools in hand. The hammer, pencil, paintbrush, electrical tools, table saw, chalk line, fine-tooth saw, and chisel is all you need.
Plus, keep white paint, tack nails, primer, nailing strip lumber, masking tape, screws, electrical outlet box, and rope light on one side for greater accessibility.
Let’s begin the process!
- Step 1 –Paint and Cut the Lumber
Take a 2×6” lumber and apply a primer. Let it dry and now apply a white paint coating to make the whole surface look even. What’s this lumber for, by the way? Actually, you’re going to use it to nail the strips.
Now it’s time to apply an identical finishing on the back of the crown. If the crown size is 52/36, tilt the table saw blade to a 52-degrees angle to match the crown molding’s spring angle.
Now you have to make cuts against the table through the painted side of the lumber. End it up by returning the blade to the vertical and slice the nail strips off.
- Step 2 –Now Mark the Placement
Now you have to cut the nailing strip and crown molding of 24” and join them together to make up a light trough. Sounds impressive! Right?
Next, assemble the rope lights against a wall by holding the ends of each. Check and examine the lightning effects patiently and at varying heights.
But make sure it’s not too close to the ceiling that there’s no space for the outlet box. Once you’re pleased, it’s time to mark its position at the end of the nailing strip, most probably, 4.5” from the ceiling.
- Step 3 –Spot the Level Line
After choosing the ideal height, you have to mark each corner of the room by drawing chalk lines. At this spot, you’ve to resist your wish to check the level of this straight line.
The line will absolutely look fine when paralleling with the ceiling silhouette.
But once you even think of running a level line with a so-called leveled ceiling, the unprecedented situation is going to grab your attention to defect. So, Beware!
- Step 4 –Fasten Nailer Strips
It’s an important step; any error here will result in an overall imbalance. Be cautious while marking the position of wall studs using masking tape and a stud finder.
If you want to ensure that the strips’ placement is proper, place the white-painted side of the strips to face the ceiling.
Ensure that each strip end should be 4” away from the inside corner if you really want to avoid the folding. Moreover, you’ll see the butt-fitted ends of crown molding extending throughout the wall.
Trust, me it’s going to be a mesmerizing spot.
- Step 5 –Time to Install an Outlet
Here’s the core of rope LED lighting –an outlet that will power the whole enlightening thing up. So make sure you install a switched electrical outlet at an accessible point.
It will be best if you place it near the edge of the nailing strip. But wait, one thing you’ve to keep in mind! There should be enough space for installing a cover plate.
You have to wire the circuit using a different switch to make a particular light independent of others. In this way, you can adjust the lighting levels according to your mood.
- Step 6 –Make the Cutlines
After you’re done installing the crown molding, it’s time to nail it in place by butting the backside against the strip. How you’ll do that, by the way?
Here’s a special technique that you have to apply while dealing with the coped corners so the LED light can make the right turn.
Make sure you’re holding the coped piece against the piece rammed to the wall. Now run the pencil on the backside to mark the cutline.
- Step 7 –Cut the Corner
You’re almost approaching your goal so perform this second last step well. Using a chisel and fine tooth saw, you have to eliminate the waste from the butt-fitted piece.
But wait, there’s no need to worry if the cut isn’t looking neat or pretty because it’s not going to be visible anyway. It’s all for creating a clear way for your rope LED lights.
- Step 8 –Finally Install the Lights
Here’s the final step –the most anticipated moment when you’re going to lay the lights inside the designed trough. Turn the power on and feel the mesmerizing rays of lights reflecting the ceiling. Make believe; it’s hyper-real.
The way you did this whole process for a single room, you can apply these steps wherever you want crown molding in your home.
Beautify Your Crown Molding With Rope Lights – Bottom Line
We all get freaking crazy at some part of our lives where we need a change –a change in our homes, in our lives. If you want an up-graded innovation, you’re not an exception.
There are no words to explain what crown and coves turn into after getting embellished from rope LED lights.
Follow these simple step-by-step guides and mold your dull-looking area into a sparkling and immersive environment.
Comments on this guide to Beautify Your Crown Molding With Rope Lights article are welcome.
Lighting
Lighting Posts
Reasons to Consider Copper Light Fixtures
Best lights options for decks terrace lighting
Getting your home filled with light
Home Articles
Residential Architecture Design
Comments / photos for the Beautify Your Crown Molding With Rope Lights Advice page welcome