The basic flute fingering chart advice, Musical instrument hold tips, Learning to play music guide
The Basic Flute Fingering Chart
post updated 11 February 2024
At first glance, a fingering chart for the flute can look confusing. Because of the challenges of publishing, several charts have been developed over the years which adds to the confusion.
Let’s sort it all out so you can quickly learn how to play the flute.
14 January 2020
How To Hold the Flute
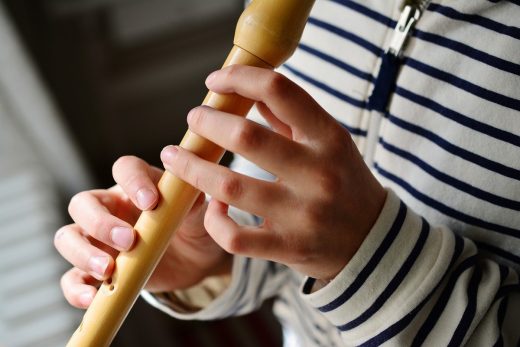
A fingering chart for flute is read as if you’re holding the flute in the proper position. Your fingers of the left hand are curled around the flute while your left hand is positioned so that your fingers are pointing away from you.
Your fingers don’t slide around from this position so you just have to know when to press each button.
- You first finger skips the first key. It’s controlled by the second key.
- Skip the next key. The middle finger controls the following key and your ring finger controls the next two keys (they move together).
- Your pinky controls the key that sticks out from the body of the instrument which is known as the Ab or G# key.
- Continuing on your left hand, the thumb controls the two keys in the back. These two keys known are known as the ‘B’ key and the ‘Bb’ key.
- The B key is the one that looks like a teardrop. The Bb key is the round one.
- On your right hand, your index, middle and ring fingers control the three keys beyond the key that’s next to the Ab/G# key.
- Your right-hand pinky is in charge of all the buttons on the end joint of the flute. The one closest to the main body is the Eb key, and that’s where your pinky will spend most of its time. The other keys will help control the notes at the bottom and top of the flute’s registers.
- Some flutes are made with a low ‘B’ key on the end joint. This allows you to play a low ‘B’ below middle C. This is key is also helpful when learning the fourth register.
- The last challenge are the keys at the end of the flute and the smaller button-like keys in-between the hand. The smaller buttons are called “Trill keys”. These buttons are used for both, trilling and also for playing notes in the highest register.
How to Read a Graphic Flute Fingering Chart
A fingering chart graphic will show all open holes, mimicking the look of a flute as you would hold it. If the hole is filled in, press down on that key. If it’s just an outline, don’t touch it.
How to Read a Number-Based Flute Fingering Chart
Some charts don’t have visual guides. Instead, you’ll see numbers and notes.
- On numbered fingering charts, you’ll see B or Bb 1 2 3 G# | 1 2 3 Eb
- The three keys on the end joint next to the Eb key are lined up parallel to the body. Reading from farthest to closest to your body, they are shown as B, C and C#.
- The trill keys are written as D and D#.
Your fingers are numbered as follows:
Left Hand
- Index Finger
- Middle Finger
- Ring Finger
Right Hand
- Index Finger
- Middle Finger
- Ring Finger
Tips For Learning a Flute Fingering Chart
Learning a fingering chart isn’t difficult if you break it down into smaller sections.
- The flute is divided into four registers. Even though you may think it’s best to start at the bottom and work your way up, the way the instrument is designed, it’s actually easier to start in the middle register and work your way out in both directions. Getting a good tone at the extreme ends of the scale can be very challenging.
- Start at G-4 on the second line of the treble clef staff. The air doesn’t have to travel as far to create the tone so you won’t get winded as quickly. Work your way out from there.
- Besides the very top and very bottom of the instrument, other places that can be a challenge are at the point where there’s a register change. Your embouchure needs to be strong enough to make subtle changes.
- Don’t lift all of your fingers off of the keys to play the next note. Lift what you need, close what you need.
- Hold the flute with your right elbow positioned just below parallel to the floor. Too much of a bend at the wrist will hinder your technique. Too high and you lose precious lung capacity.
- Practice long tones. They’re boring but putting up with this practice is the fastest way to improve your tone. No one cares how fast you can play if your tone is muddled.
- The fourth octave of a flute is challenging and should only be attempted after you’ve mastered playing up to C-7.
- If you see a sign that says 8va over a note, this means that the note is to be played one octave higher than written.
Different Flute Fingering Charts
There are other flute fingering charts. These are fun to learn after you’ve mastered the beginner flute fingering chart.
Trilling Charts
Trilling charts are very useful. One of the distinct features of the flute is its ability to switch rapidly between two notes. Trilling should be learned soon after learning to produce good tones since it helps with your overall technique.
Alternate Fingerings Charts
Composers and instrumentalists have discovered a wide range of tones that can be made with the flute. There are several charts on how to get certain tones with intriguing names such as “ghost tones.”
For producing a great sound, a quality instrument makes all the difference in the world. Learn more about the best flutes and other great instruments at WindySounds.com.
Comments on this guide to The Basic Flute Fingering Chart advice article are welcome.
Music Building Articles

image courtesy of article provider
Comments / photos for the The Basic Flute Fingering Chart Advice page welcome


